Occupancy Areas Editor
The Occupancy Areas Editor is used to manage occupancy monitoring areas. An occupancy monitoring area represents a physical space where SAFR is monitoring how many people are in it.
Occupancy monitoring areas rely on SAFR's direction of travel recognition feature, so the camera(s) that the occupancy monitoring areas use should be positioned such that people are either moving directly away, directly towards, directly to the left, or directly to the right of the camera. See the Desktop Client Camera Preferences documentation for additional information about the direction of travel feature.
In addition, the following preferences must be set for the occupancy monitoring areas to work:
- Every participating camera must be using an Operator Mode that can generate events.
- Events must be enabled in the Desktop Client's Events Preferences menu.
- Face detection and person detection must be enabled in the Desktop Client's Detection Preferences menu. If person detection isn't enabled, then anybody whose face can't be seen (e.g. only the back of their head is visible) won't be counted.
Occupancy Dashboard, Occupancy Alarm Dashboard, and Occupancy Reports use occupancy monitoring areas to generate their output, so you must define at least one area to use them.
Define New Occupancy Monitoring Areas
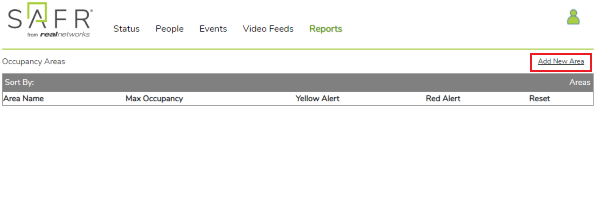
To define a new occupancy monitoring area, click on Add New Area in the upper right corner:

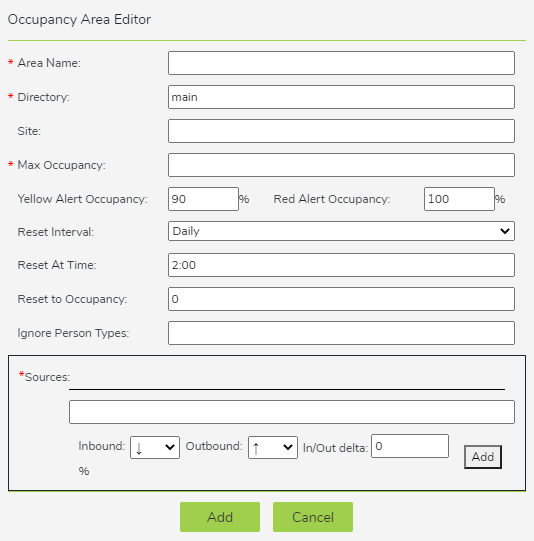
You will be prompted to enter the following information:

- Area Name: Name of the occupancy monitoring area you're defining.
- Directory: User directory for which the occupancy monitoring area will be defined.
- Site: Filter that allows you to limit the area to cameras with the specified site value. Site values can be set using the Account Preferences menu within the Desktop Client.
- Max Occupancy: Maximum number of allowed people in the occupancy monitoring area.
- Yellow Alert Occupancy: Percentage occupancy at which the area is flagged with a yellow alert.
- Red Alert Occupancy: Percentage occupancy at which the area is flagged with a red alert.
- Reset Interval: Specifies how frequently you want the occupancy level of your occupancy monitor area to reset to 0. This setting can be useful if, for example, you know that your store will always be empty at 2 AM and you want to make sure the occupancy level resets back to 0 every morning. This field has 3 possible values: Daily, Weekly, and Never.
- Reset At Time: The time of day when you want the occupancy level of your occupancy monitoring area to reset. Note: This field is only available when the Reset Interval field is set to Daily or Weekly.
- Reset to Occupancy: The occupancy to which you want to set the occupancy monitoring area when the reset interval occurs.
- Ignore Person Types: Specifies the Person types, if any, that should be ignored and not counted.
- Sources: Specifies which cameras to use to monitor occupancy. The cameras use SAFR's direction of travel feature (described in detail in the Camera Preferences documentation). The arrows next to Inbound and Outbound represent the camera direction that corresponds to entering or leaving the monitored space. Note that although direction of travel recognition defaults to 10%, we recommend that you go to your Desktop Client's Camera Preferences menu and change the values to 40%.